Day 15 Update—Pollination
A little bit has happened since the Update of Day 12 Update….
After counting hairs, putting the data into a spreadsheet, I still had to separate out the two populations from each other–the top 10-15% hairiest plants that would parent the Hairy generation needed to be isolated from the rest of the plants.
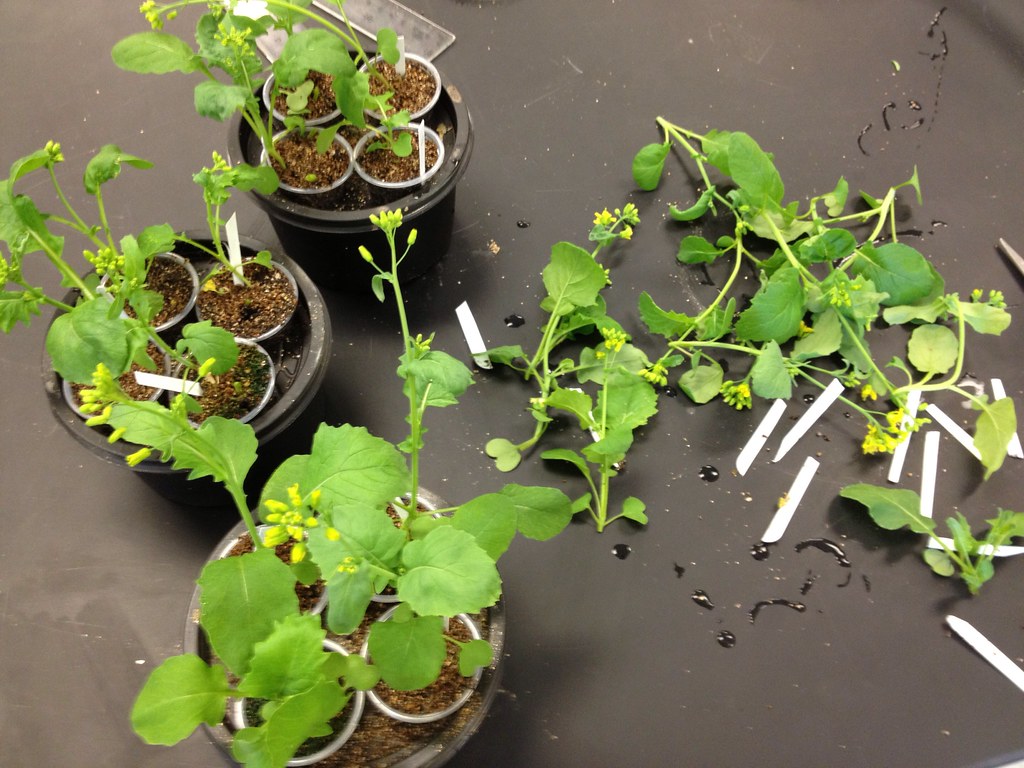
On day 13, I decided to select all the plants that had 25 or more trichomes on the first true leaf’s petiole. That amounted to 13 plants according to my data but interestingly, I couldn’t find one. (too bad for that plant–it will just have to swap genes with the less hairy part of the population.) Now there is a bit of a problem. You want to minimize the chance of mixing the pollen between the selected populations. This means that you need at least two pollinator wands (bee-sticks) , one for each population and you have to keep the beesticks separate from each other. If yo are going to keep the two population separate during pollination, you really can’t have a hairy plant growing with a non-hairy plant in the same portion cup or even in the same growing system. Mixing pollen will be too likely. Likewise the two plants growing in most of the portion cups, by this time simply have their roots far too entangled to allow for any transplanting. Woe is me but the only solution I have come to is to remove the non-hairy plant from the portion cup. It is a sad time…
Scissors work well. This doesn’t really bother me, since I am a grizzled, old veteran plant thinner. I’m able to make these choices with hardly a twinge of ethical angst. However, some of my students haven’t been so tough minded–just a warning out their to biology teachers. Perhaps you can sell the idea to the students by suggesting you are just harvesting salad greens–they do make a lovely addition to your salad, btw.
Note in the image from Day 13 that some of the plants are already flowering. I removed a couple of open flowers in the selected, hairy population to minimize the chance of contamination. The selected hairy population is in the far tray and amounts to 12 plants. I am still taking the remaining plants through their life cycle to produce more seed. They are in the two, near trays.
Day 14
I have always been amazed at how excited students get when it comes to pollination day. Note that more flowers are open but more flowers will open over the next few days. I’ll pollinate once a day at least 3 days–maybe 4.
First step is to make pollination wands or bee sticks from dead bees. Bee hairs are great for transferring pollen and these flowers are a bit too delicate for students to use a brush in my opinion. I have done so, myself but it is not ideal. I like the bees so much that each summer/fall, I try and either collect a few bees (with a net) or contact a bee keeper for some dead bees. The dead bees are stored in the freezer. I have dead bees in a couple of freezers (including my personal freezer at home.) (I have an understadning wife who also likes to grow fastplants.) I keep them around for times like this. The bee’s thorax is glued to the end of a toothpick with hot glue. Remember I made two bee sticks, one for each population
The bee thorax is gently rolled across the anthers and the stigma. This bee stick is freshly made and is not covered with pollen. It will be after this flower. If you observe closely, a newly opened flower’s stigma is a very light green. After pollination it is yellow from the pollen.
Observant folks might notice that the bee sticks in these images are made from two types of bees–honeybees and bumble bees…
I pollinated all the open flowers on Day 14 and on Day 15. I also filled the water/fertilizer reservoirs on Day 14. Here’s a image from Day 15. Note there are many more open flowers.
Look closely, in the cup in the immediate foreground you’ll see where I am storing my bees stick for the hairy plants, simply stuck into the soil. There is also a similar bee stick in the less hairy population in the background.


